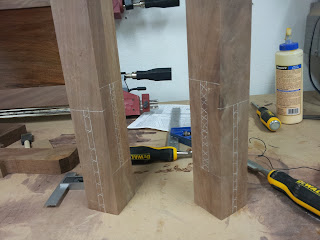
This week there was a lot of sanding being done. Doing this was so I could prepare for the next step... Finish.
Though sanding seems like an easy proposition... To ensure it is done correctly I take the following steps
I mark the workpieces heavily with a pencil then sand until all of the pencil marks are removed. Because the workpieces came directly from the planer, I sanded using each of the following grits..
80
120
150
220
After sanding I applied one coat of shellac. Click here to see the product I used. The link shows a spray can; however, what I used was the quart.
The application was with a rag. I cannot stress how important it is to be sure to apply thin coats. Quite honestly the thinner the better, and don't be concerned if there is slight streaking. This will happen and clear up in later coats. Just remember "thin to win".
After the first coat... I sanded lightly using 320 grit sandpaper. I then applied a second coat.
After the second coat I applied a coat of Johnson's Paste Wax using 0000 steel wool. I then let it set up for about 15 minutes and then buffed it out. There will be more pictures coming in the next post as glue-ups begin.
Wednesday, February 27, 2013
Take a Shellacing
Labels:
Cradle,
crafts,
Fixing Tenon,
hobbies,
lil wodguy,
lil woodguy,
lilwoodguy,
lumber,
Mortise,
Mortise and Tenon video,
projects,
Shellac process,
shellacing,
Tenon,
Tenon Cheeks,
Tenon Shoulders,
tools,
Woodworking
Monday, February 18, 2013
Sometimes We Take Two Steps Back (Tenon Fixing)
There were many challenges this week that came up with the
walnut cradle. When trying to
clamp up the cradle I found the spindles were about ½” long. It could have been worse, in that, they
were not short. One end of the
spindle had to be lopped off and the tenons all had to be re cut on one side.
There was lesson learned here. Test fit two of the spindles to check that everything fits
before moving on and cutting all at once.
Not a big deal, just a bit of lost time and effort. These are the trials of woodworking all
of us go through.
In the process of getting the tenons fixed & dialed in with a
chisel, I busted two. My good
friend Yoshi recommended that I drill out the end, and use a dowel rod as a
tenon.
Below is a video and some pictures of the process for fixing tenons.
Repaired Spindles
Labels:
Cradle,
crafts,
Fixing Tenon,
hobbies,
lil wodguy,
lil woodguy,
lilwoodguy,
lumber,
Mortise,
Mortise and Tenon video,
projects,
Tenon,
Tenon Cheeks,
Tenon Shoulders,
tools,
Woodworking,
Woodworking Video
Sunday, February 3, 2013
The Mortise and Tenon Joint
I personally like to cut the mortises first. This allows me to cut my tenons to match. So this is how we got started.
First we started by marking or laying out where all of the
mortises will be cut on each work piece.
It is important to be as accurate as we can when doing.
Here is a picture of the layout:
After Marking cutting the mortises they must be cut. We do this by using the dedicated mortiser. It is important to mark the sides that will be put toward the fence. This is because just in case we are off a little bit we can still match up the mating work pieces correctly.
Here is a video showing the cutting of mortises, and some pictures of what the mortised work pieces of the walnut cradle look like once completed.
In the past I cut tenons on the table saw; however, I had
some difficulty getting them sized just right. I also ran into several challenges with the shoulders and
tear out. The latest tenon cuts
were made on the band saw. What a
difference. I found this was much
more accurate for me.
Here are two videos of the process:
A)
Cutting the cheeks was done using the band saw fence
B)
Cutting the shoulders was done using a miter gauge and a stop
block
Labels:
Cradle,
crafts,
hobbies,
lil wodguy,
lil woodguy,
lilwoodguy,
lumber,
Mortise,
Mortise and Tenon video,
projects,
Tenon,
Tenon Cheeks,
Tenon Shoulders,
tools,
Woodworking,
Woodworking Video
Subscribe to:
Comments (Atom)


